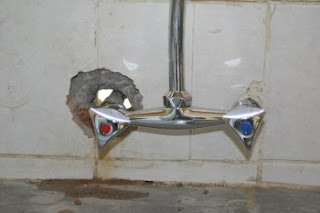
Step 1 - Stopping the water flow
In Zambia, we're not allowed to turn off the water to our house without having someone from the water company come out and turn it off for us. If we have a shut-off valve somewhere after the meter, we can turn it off there, but unfortunately for us, the shut-off valve for our cold water is stripped and therefore, we were unable to shut it off. So, how did I get around this first challenge? Easy, I went into the bathroom and turned on the cold water full blast. This took the water pressure from the kitchen sink and allowed me to remove the old faucet.
Step 2 - Plugging up the cold water outlet
When I got the new faucet ready to install and began to screw it on, the bolt for the connection on the new faucet cracked - meaning that I needed to get another one. I couldn't leave the cold water running in the bathroom while I went to the store. So, I had to seal the pipe and turn off the water in the bathroom. How did I do this? Even easier, a potato! It works rather nice, don't you think?
The reason the new faucet cracked was because the hot water pipe (on the left) was coming through the wall at an angle. The angle was too great to get the new faucet back on. So, I grabbed a screwdriver and a hammer and began chipping away. After getting help from our guard Charles, we finally were able to get through the entire wall and loosen the pipe.


Step 4 - Seal the Joint
After unsuccessfully trying to seal the joint using pipe tape (several different times) I had to resort to desperate measures. I bought some PVC sealant from a local hardware store (there was nothing else in the stores here to use). After coating the joint several times, I proved what I expected, PVC sealant doesn't work on metal pipes.


Step 5 - Ask for help
After trying several different things over the period of a few days, I finally gave up and enlisted the help of my teammate Graham Melville. He quickly diagnosed that the joint was too loose and that the answer was to use pipe tape, which I had tried to use, but to use a lot more of it. After spending 2 days trying to fix the leak, Graham fixed it in 15 minutes.
Because the pipes are so old, I didn't want to risk breaking them by putting undue pressure on them. So, instead of trying to bend the pipe upward to give a level faucet, we just covered the hole with cement and left the sink leaning a little to the left. It may not look all that great, but it isn't leaking!


2 comments:
Hey dude, This is so funny! I don't miss Zambia plumbing;) Remember, when in Zambia do as the Zambians do...you forgot to use the shoprite bag, and that is why it leaked!!
awesome - the potato was my favorite part
Post a Comment